- Limited Offer- Get Flat 30% OFF on All Web-Hosting Plans !
- +917737300013
- 0141-3523163

The impact of AWS in the Cloud industry
Table of Contents
What are the requirements for building a company that dominates its sector? It is simple to say, but far more challenging to put into action:
- A strong vision: CEOs have clear plans and vision, and they know what steps they need to take for their company to emerge victorious. They are integral players in business success.
- Continuous innovation: For market trends and customer needs, companies need to innovate their products, services, and business models. This necessitates a culture of experimentation, risk-taking, and a willingness to learn from setbacks.
- Agility and adaptability: Industries are changing continuously, and businesses that can swiftly adapt to shifting market conditions, consumer tastes, and technological advancements.
Now, let’s find out the remarkable achievements of Amazon Web Services (AWS), an Amazon subsidiary renowned for offering on-demand cloud computing platforms and APIs to governments, individuals, and businesses, all on a metered, pay-as-you-go basis.
AWS stands as a leader in the cloud industry, exerting substantial influence. As the leading supplier of cloud computing services, AWS had a 33% market share for cloud infrastructure.
The growth trajectory of AWS has been nothing short of extraordinary over the past decade, significantly contributing to its expanding market dominance. According to data from Synergy Research Group, AWS’s revenue soared from approximately $2.1 billion in 2012 to a staggering $45 billion in 2019, marking an astounding twenty-one-fold increase within just seven years. Such rapid growth has firmly established AWS as an outstanding player in the cloud computing arena.
Now, let’s explore the key factors behind AWS’s supremacy in the cloud computing market:
Early Mover Advantage

A significant contributor to AWS’s success is its early entry into the market. AWS made its debut in 2006, when the concept of cloud computing was still in its infancy. By seizing the role of an early pioneer, AWS solidified its position as a dominant industry player and cultivated a strong brand reputation. Furthermore, AWS harnessed the expertise of its parent company in e-commerce and logistics, constructing a highly efficient and scalable cloud infrastructure.
Efficient Resource Utilization

Amazon’s expertise in constructing and fine-tuning systems for operating a large-scale e-commerce business bestowed upon AWS a unique advantage in the cloud computing arena. Using its technological infrastructure and data centers, AWS established a cloud platform that other businesses could utilize for building and operating their applications. This approach allowed AWS to continuously test and enhance its services in real-world scenarios before extending them to customers. Additionally, Amazon’s existing developer relationships and experience in building APIs played a major role in attracting a substantial and loyal customer base.
Comprehensive Service Offerings

AWS provides an extensive array of services, affording customers the flexibility to select the precise services needed to construct and expand their applications. These services are available on a pay-as-you-go basis, ensuring that customers only pay for the resources they actively utilize. AWS also furnishes an assortment of tools and resources for service management, workflow automation, and application monitoring. This breadth and depth of service offerings constitute a fundamental reason behind AWS’s dominance in the cloud computing landscape.
Reliability and Security

A steadfast commitment to reliability and security underscores AWS’s appeal to customers relying on their services to maintain seamless business operations. AWS boasts a global network of data centers engineered for high availability, employing advanced technologies to bolster system resilience and accommodate diverse scenarios, including unexpected surges in demand or equipment malfunctions. On the security front, AWS deploys multiple layers of protection encompassing network security, access controls, and encryption. Moreover, AWS complies with a wide spectrum of security and privacy standards, including ISO 27001, SOC 2, and HIPAA, addressing the needs of industries subject to these regulatory requirements.
Cost Efficiency

Amazon’s track record of price reductions and the introduction of new services align with its commitment to helping customers derive greater value from their resources. This strategy not only raises customer loyalty but also attracts new clients seeking cost-effective solutions for their business requirements. AWS’s Trusted Advisor service serves as a prime example of its commitment to helping customers optimize resource usage and reduce expenses. By proactively identifying underutilized resources, AWS empowers customers to make informed spending decisions and avoid unnecessary costs.
Data-Centric Focus

The success of AWS is largely due to Amazon’s diligent attention to data collection and analysis. Through weekly business reviews that examine thousands of metrics, AWS identifies areas for improvement and continually optimizes its services and operations. This data-driven approach enables AWS to deliver superior offerings and maintain its industry leadership.
Using AWS for Cloud Hosting
AWS has firmly established itself as a leader in the realm of cloud services, showcasing remarkable performance and versatility.
AWS provides a spectrum of services, making website and web application hosting a straightforward venture for organizations. Noteworthy components of AWS’s offerings include Amazon EC2, a platform for virtual machine instances, Amazon S3 for storage solutions, and Amazon CloudFront for efficient content delivery, each accompanied by its pricing model.
Here’s an overview of a few AWS services:
Amazon Elastic Compute Cloud (EC2)
Amazon EC2 furnishes adjustable computing capacity in the cloud, enabling you to rent virtual machines, referred to as “instances,” to run your applications.
Amazon Lightsail
Amazon Lightsail simplifies the setup, operation, and scalability of web applications and websites. It presents a user-friendly interface and pre-configured services tailored for web hosting, databases, and email, offering a more accessible alternative to Amazon EC2.
Amazon Simple Storage Service (S3)
Amazon S3, a highly scalable object storage service, facilitates the storage and retrieval of substantial data volumes from anywhere on the internet. It stands as a dependable, scalable, and cost-effective storage solution.
Amazon Elastic Block Store (EBS)
Amazon EBS is a block-level storage service designed for compatibility with Amazon EC2 instances. It provides persistent storage, ensuring that data on an EBS volume remains intact regardless of the lifespan of the associated EC2 instance.
AWS Snapshot
An EBS snapshot captures a point-in-time copy of an EBS volume, serving the purpose of creating new volumes or restoring existing ones. These snapshots are incremental, preserving only the altered blocks after the initial snapshot.
AWS FSx
Amazon FSx is a fully managed file storage service, simplifying the setup and operation of file systems within the AWS Cloud. It delivers accessible, scalable, and managed file storage accessible via the NFS and SMB protocols.
Amazon RDS (Relational Database Service)
Amazon RDS streamlines the setup, operation, and scalability of relational databases in the cloud. It manages essential tasks like backups, software patching, failure detection, and recovery.
Amazon Aurora
Amazon Aurora, compatible with MySQL and PostgreSQL, offers a highly available, scalable, and fault-tolerant relational database service. Features like automatic failover and self-healing storage increase its resilience.
Amazon DynamoDB
Amazon DynamoDB, a fully managed NoSQL database service, ensures fast, predictable performance with seamless scalability. It incorporates features such as automated and on-demand backups, in-memory caching, and encryption at rest.
Amazon CloudFront
Amazon CloudFront, a content delivery network (CDN) service, securely publish data, videos, applications, and APIs to a global audience, guaranteeing low latency, swift transfer speeds, and secure connections.
Amazon Route 53
Amazon Route 53, a highly available and scalable Domain Name System (DNS) web service, facilitates routing end-users to internet applications by translating domain names to IP addresses. It also offers health checks and traffic management capabilities.
A salient advantage of adopting AWS lies in its scalability. AWS empowers businesses to effortlessly expand or contract their cloud resources as needed, ensuring their websites can accommodate high traffic and demands without encountering downtime or performance.
Wrapping Up
AWS has revolutionized the cloud industry, offering scalable and cost-effective solutions that have empowered businesses worldwide. Its pioneering role has not only accelerated digital transformations but also promoted innovation across various sectors. As cloud computing continues to play a central role in the modern business landscape, AWS stands as a trailblazer, poised to shape the industry’s future.
Also Read:- Things To Remember While Buying Managed Cloud Services

How to Improve Core Web Vitals: A Step-by-Step Guide
Google uses a limited set of criteria to gauge and evaluate websites. Among the latest and most vital factors influencing Page Experience are Core Web Vitals. Neglecting to optimize your website for these metrics could potentially harm your Search Engine Optimization (SEO) efforts and the overall User Experience (UX).
The encouraging news is that once you grasp the concept of Core Web Vitals and know how to assess them, you can proactively enhance them. This proactive approach ensures that you’re delivering a robust user experience and adhering to Google’s criteria, ultimately boosting your search engine visibility.
Table of Contents
What do you mean by Google Core Web Vitals?

Google’s Core Web Vitals represent a Google-led initiative centered on a collection of website performance metrics aimed at evaluating and enhancing user experience. These scores zero in on the overall performance of a website and its ability to provide the best user experience, rather than merely emphasizing the total website loading time.
Even if your website loads quickly, it might not function optimally or appear promptly to users, leading to an unfavorable user experience. Users are primarily concerned with the speed at which they can interact with a web page, and this is precisely what the Core Web Vitals metrics assess.
To accomplish this, Google identifies three Core Web Vitals:
- Largest Contentful Paint (LCP).
- First Input Delay (FID)
- Cumulative Layout Shift (CLS)
For better user experience these metrics are the most important ones for your website.
These names might sound a bit complex or technical, but don’t be concerned! These are easy to understand, and you will get proper information in this blog, You’ll learn the meaning and importance of each Core Web Vital, empowering you to effectively apply them to WordPress websites.
Largest Contentful Paint (LCP)
Largest Contentful Paint (LCP) assesses the speed at which the primary content, typically the hero section or prominent image on your website, becomes visible to users. This central content, also known as the LCP element, varies from site to site, including distinctions between mobile and desktop versions. LCP elements encompass images, content, or descriptions.
Imagine visiting a website and noticing that the main image, often a hero section, fails to load. As a visitor, your likely reaction would be to leave and seek an alternative website. This illustrates the close connection between the Largest Contentful Paint metric and user experience, underscoring its importance among the Core Web Vitals for WordPress sites.
Google has established specific thresholds for LCP times:
- Good: Less than or equal to 2.5 seconds
- Needs Improvement: Equal to less than 4.0 seconds
- Poor: More than 4.0 seconds.
First Input Delay (FID)
First Input Delay (FID) gauges the duration between user interaction and event processing. In simpler terms, FID represents the time from a user clicking on a link to their browser initiating event processing. User interactions encompass actions like clicking on links, Call-To-Action (CTA) buttons, or submitting forms.
Consider when a user fills out a form and clicks the submit button. How swiftly does your website process this interaction and successfully submit the form? This precisely defines what the First Input Delay (FID) measures: the speed at which your website handles user interactions.
First Input Delay is heavily influenced by JavaScript, making optimization of the FID metric for Core Web Vitals in WordPress sites a complex task.
Google categorizes First Input Delay (FID) times as follows:
- Good: Equal to or less than 100 ms
- Needs Improvement: 300 ms or less
- Poor: More than 300 ms.
Cumulative Layout Shift (CLS)
Have you ever encountered a website that suddenly alters its layout or fonts while you’re in the middle of reading? Or just as you’re about to click on something, it shifts position? Such changes can be frustrating for users, resulting in a poor user experience.
Cumulative Layout Shift (CLS) is a crucial metric among the Core Web Vitals for WordPress websites. It measures the frequency of layout shifts that users commonly encounter on various websites.
Ads often contribute to CLS issues because they come in various sizes with unspecified dimensions. An example is a news website where the article content changes and the site continuously loads ads, causing users to lose their place while reading.
Google sets the following scores for Cumulative Layout Shift (CLS):
- Good: Equal to less than 0.1 seconds
- Needs Improvement: Equal to or less than 0.25 seconds
- Poor: More than 0.25 seconds.
Tools to Calculate Core Web Vitals on WordPress Website

Google offers well-known tools designed for assessing Core Web Vitals on WordPress websites. These tools are used to find out and fix user experience issues. The ones used to calculate Core Web Vitals are Lab tools and Field Tools.
You can see in the above image that all three metrics are measured by Google tools- LCP, FID, and CLS- apart from Chrome DevTools and Lighthouse.
Chrome DevTools and Lighthouse use Total Blocking Time (TBT) as a substitute for First Input Delay (FID). Introduced in 2020 as a Lighthouse Performance metric, TBT exclusively offers Lab Data, while FID relies solely on actual user data for measurement.
For monitoring Core Web Vitals on a WordPress website, consider the following five tools:
- Lighthouse
- PageSpeed Insights
- Search Console
- Web Vitals Extension
- Web.Dev
How to Evaluate Your Google Core Web Vitals Performance

When it comes to testing Core Web Vitals for WordPress websites, PageSpeed Insights emerges as the most straightforward solution. It requires only your website’s URL. Just input the URL and click the “Analyze” button.
Once PageSpeed Insights meticulously examines the URL, it presents the core web vitals data within the ‘Field Data’ section.
At the top, the field data indicates whether your page passes the Core Web Vital assessment or not. You can access all three Core Web Vitals scores. Your goal should be to improve these vital metrics while adhering to Google’s recommended scores:
- Largest Contentful Paint (LCP) – 2.5 seconds
- First Input Delay (FID) should be under 100 milliseconds.
- Cumulative Layout Shift (CLS) – Less than 0.1
Identifying the Largest Contentful Paint (LCP) Using Pagespeed Insights
The largest Contentful Paint (LCP) gauges how swiftly your website’s primary content becomes visible to users. To identify the LCP, navigate to the diagnostics section in the PageSpeed Insights tool and expand the “Largest Contentful Paint” element tab.
Here, you’ll pinpoint the largest contentful HTML element painted by Google.
It’s important to note that an HTML element present on the desktop version of your site may differ from the mobile version. Therefore, optimizing LCP time is crucial for both iterations of your website.
Identifying FID and TBT Using Pagespeed Insights
As a reminder, First Input Delay (FID) measures the duration between user interaction and event processing. You’ll find the FID time exclusively in the ‘Field Data’ section since FID relies on actual user data. PageSpeed Insights conducts a lab test, which means it cannot display the FID score. In the Lab Data section, you’ll encounter Total Blocking Time (TBT) as an alternative metric to First Input Delay (FID).
Total blocking time is directly related to FID. Improving TBT will lead to better FID performance.
Identifying CLS Elements Using Pagespeed Insights
To recap, Cumulative Layout Shift (CLS) is related to sudden changes in a website’s content during interactions, causing the layout to shift as new content loads.
Visit the “Avoid large layout shift” section within the Diagnostics area to identify the element responsible for these shifts, which impact your site’s score.
How to Access Comprehensive Google Core Web Vitals Data for Your Website

If you’re examining the root page of your site and wish to access Core Web Vitals data for all pages on your WordPress website, Click the ‘Show Origin Summary’ checkbox.
For more comprehensive and detailed Core Web Vitals reports for your WordPress site, consider the following options:
- Utilize the Lighthouse speed test available on the Web.dev Measure tool. Simply enter your URL and initiate the test by clicking the ‘Run Audit’ button. This will provide you with an extensive audit report on the Core Web Vitals performance of your WordPress website.
- Alternatively, you can perform a Lighthouse speed test using the built-in functionality within the Google Chrome browser. Follow these steps:
- Open your website in Chrome.
- Access the inspect element feature (right-click on the screen, then select “inspect”).
- Choose the Lighthouse option within the tabs.
- Click the ‘Generate Report’ button to initiate the test.
These methods will give you a comprehensive view of the Core Web Vital’s performance across your WordPress website.
The Essential Steps to Improving Your WordPress Web Vitals

Improving your Core Web Vitals in WordPress is achievable by implementing essential performance optimization techniques.
Let’s explore these strategies step by step.
Optimize Your WordPress Hosting
The cornerstone of your website’s performance lies in your WordPress hosting. While there are various technical and non-technical methods to enhance site performance, the quality of your hosting is paramount.
To maximize your efforts in business growth rather than getting bogged down by server complexities, investing in the best WordPress hosting is crucial. It not only saves valuable human resources and time but also delivers superior performance. WordPress hosting offers a range of essential features, including:
- Enhanced Speed
- Server-side Caching
- Improved Security
- Staging Environments
For instance, Cloudways provides WordPress hosting solutions equipped with valuable features such as a pre-installed Breeze cache plugin and Varnish cache on their platform. These elements play an important role in elevating your Core Web Vitals scores.
Improving Largest Contentful Paint (LCP) Score
The primary objective for users is to access valuable content quickly on their screens. The faster the content loads, the higher your LCP (Largest Contentful Paint) score will be. As previously discussed, you can identify the largest content element in the Diagnostics section of the PageSpeed Insights tool. Here, you’ll find the elements contributing to the LCP score.
If the largest element happens to be text, you can enhance the content’s performance by dividing it into smaller paragraphs and using headings for improved readability.
In cases where media files constitute the largest portion of the LCP score, consider converting larger images into smaller ones. Smaller image files load more swiftly, preventing prolonged loading times and excessive page size.
To optimize your images and increase your Core Web Vitals score for your WordPress website, consider these plugins:
- EWWW Image Optimizer
- ShortPixel Image Optimizer
- Imagify – Image Optimization & WebP Conversion
- WP Compress – Comprehensive Image Optimization
- Smush – Lazy Load, Optimize, and Compress Images
Implementing these plugins can significantly enhance your website’s image optimization, thereby contributing to improved Core Web Vitals performance.
Improving First Input Delay (FID) Score
The most effective strategy for enhancing FID (First Input Delay) scores is to opt for managed WordPress hosting. Most managed WordPress hosting platforms come equipped with built-in cache settings designed to speed up event processing.
Another straightforward method to boost your FID score involves implementing the Deferred JavaScript technique on your WordPress website. This technique accelerates the display of web pages without the need to wait for JavaScript to load. You can achieve this by utilizing cache plugins that offer Deferred JavaScript options.
In this article, we’ll utilize the Breeze Cache plugin, which is available to all WordPress users at no cost. After installing and activating the plugin, navigate to WordPress Settings > Breeze. Within the Advanced Options tab, you’ll find the ‘Move JS files to footer’ and ‘JS files with deferred loading’ options. Enter the URL of the JS file, then click the Save Changes button to apply your modifications.
By implementing these changes, your site will no longer be required to await JavaScript loading, resulting in an improved First Input Delay (FID) score. This optimization will contribute positively to your WordPress website’s Core Web Vitals performance.
Improving Cumulative Layout Shift (CLS) Score
Cumulative Layout Shift (CLS) pertains to abrupt alterations in content that can displace other elements on the screen.
To address CLS issues effectively, it’s essential to identify the elements causing these layout shifts. You can perform this analysis in the Diagnostics section of the PageSpeed Insights tool, which pinpoints elements requiring attention to enhance Core Web Vitals for your WordPress website.
Images with improper dimensions, embedded videos, and advertisements are frequently the main offenders behind a poor CLS score. To mitigate these issues, ensure that both images and video elements incorporate width and height size attributes.
To verify the presence of size attributes on images, you can inspect them by right-clicking on your browser screen. Clicking on various page elements to access their source code allows you to examine all images and confirm whether they possess the necessary size attributes or not.
Eliminate Render Blocking Elements
Render-blocking elements encompass static files like HTML, CSS, and JavaScript files, pivotal for rendering web pages. These files often contain scripts that can block visitors from accessing content.
The Page Speed Insights tool is adept at recognizing these render-blocking elements. Typically, such elements are generated from various sources, including JavaScript and CSS files associated with WordPress plugins and third-party tools like Google Analytics. Their presence can adversely impact both the overall Core Web Vitals of WordPress websites and the user experience.
To minimize render-blocking scripts, consider these best practices:
- Minify JavaScript and CSS: Remove superfluous white spaces and unnecessary comments from your code.
- Concatenate JavaScript and CSS: Combine multiple JavaScript files into a single primary file, and do the same for CSS files.
- Defer JavaScript Loading: Instruct JavaScript files to wait until all other page elements are ready before loading.
Several plugins can assist in eliminating these render-blocking elements, including:
- Breeze By Cloudways
- WP Rocket
- Autoptimize
To eliminate render-blocking elements using the Breeze plugin, follow these steps:
- Install and activate the Breeze Cache plugin.
- Navigate to WordPress settings and click on Breeze.
- In the Basic Options tab, enable HTML, CSS, and JavaScript minification, then save the settings.
- After implementing these changes, conduct further testing to assess improvements in Core Web Vitals for your WordPress site.
For deferred JavaScript loading, refer to the ‘Improving First Input Delay (FID) Score’ section outlined earlier in this article.
Use a Content Delivery Network (CDN)
A Content Delivery Network (CDN) empowers users to access website files such as images and scripts from servers that are geographically closer to them. This not only enhances loading speed but also alleviates the server load on your site. CDNs constitute a network of servers distributed worldwide, and various third-party CDN services cater to websites.
Let’s explore a selection of third-party CDN providers:
- Cloudflare CDN
- KeyCDN
- Amazon CloudFront
- CDN77
For Cloudways users, there’s a valuable opportunity to leverage Cloudways’ collaboration with Cloudflare. You can activate the Cloudflare Enterprise CDN add-on, which extends Enterprise-level CDN capabilities to your website.
Wrapping Up!
Optimizing Core Web Vitals is a critical endeavor for website owners and developers alike. These performance metrics not only impact your search engine rankings but also directly influence the user experience.
Throughout this step-by-step guide, we’ve explored a range of strategies and techniques to boost your Core Web Vitals, from improving Largest Contentful Paint (LCP) and First Input Delay (FID) to tackling Cumulative Layout Shift (CLS) and eliminating render-blocking elements.
Remember that a fast, responsive, and visually stable website not only keeps visitors engaged but also sets the stage for your online success. By adopting the best practices, you’re well on your way to achieving exceptional Core Web Vitals scores and ensuring a seamless browsing experience for your audience. So, roll up your sleeves, dive into optimization, and watch your website flourish in both performance and user satisfaction.
Also Read:- 9 Tips To Boost Your Core Web Vitals In WordPress

Crafting a Website from Scratch: Step-by-Step Process
In the early days of computing, crafting a website from scratch was a challenge. Now, numerous website builders are available to complete the process in less time. Whether you’re a first-time visitor to our blog or an experienced individual, our carefully crafted content is tailored to meet your needs. Regardless of whether you’re a student, a business owner, or a tech enthusiast, this blog will help you construct a website from scratch.
We delve into a variety of concepts surrounding the start of website development.
Table of Contents
Why do you need a website?
The Significance of Having Your Website Statistics reveal that there are over 1.13 billion websites in existence, with WordPress powering more than 43% of them. Regardless of whether you’re running a restaurant, a salon, an IT conglomerate, or an eCommerce enterprise, websites have become the lifeblood of industries. A solid web hosting infrastructure is the foundation of any website. This includes various hosting services like shared hosting, VPS hosting, dedicated server hosting, reseller hosting, and cloud hosting.
Website owners choose these services based on their specific needs.
Websites are accessible through PCs, tablets, and smartphones, and these device owners engage in online shopping. Thus, having a website isn’t just advantageous but necessary for brand competitiveness. As we all know, the whole world is run by data; It is the website and its landing pages that give the brand credibility.
Steps for creating a website from scratch:
Step 1: Planning Your website

Start by defining your website’s primary objective. Will it cater to Gen Z or mature readers? Does it contain tech or entertainment-related data? These considerations underpin successful website development.
Focus on these questions to strategically align your website with your business objectives. Initiate your journey from scratch, encompassing broader perspectives.
How will your product be showcased? What advertising strategy will you employ? These elements shape your outcome.
Furthermore, identify the website components you wish to include. Establish communication mediums with your target audience. If you are a developer, create chat forums and get feedback for further improvement. Don’t overlook buyer personas. Consider age, gender, income, and other factors to fortify your website planning. Familiarize yourself with your target audience to promote regular content updates.
Understanding Your Audience: Proven Techniques
- Customer Interviews: Interact with regular customers within your niche through in-person interviews. This approach simplifies grasping the interests of past and potential customers.
- Connect with Ideal Customers: Identify and engage with your ideal customer base through interviews. Gain insights into the individuals who align with your brand.
- Leverage Social Proof: If direct interactions prove challenging, guide platforms where opinions are shared. Employ social listening and hashtag analysis for pertinent feedback.
- Data-Driven Insights: Data analytics yields valuable trends, that guide your approach. Illuminate the path forward by leveraging data-driven knowledge.
Mastering Website Goals:
A Blueprint for Success Whether you’re a small business owner, a blogger, or a freelancer, the eCommerce trend dominates conventional purchasing behavior. To increase your online presence, it is necessary.
- Resource Identification: Going the extra mile necessitates additional resources – be it personnel, an expanded advertising budget, or more. These resources will increase your journey toward website goals.
- Setting Deadlines: Be resolute in your goals by establishing deadlines and consistently monitoring progress. Adapt as needed to overcome potential hurdles.
- Realistic Aims: Define achievable objectives that align with your mission to enhance your online presence. Employ strategies proven to yield results.
- Periodic Progress Review: Evaluate the trajectory of your website planning and seek input from your research and development team.
Step 2: Choosing a domain

Consider the case of the InfinitiveHost brand – highlighted through its domain “infinitivehost.” Imagine a scenario where this clarity is absent. While creating a website, domain registration is necessary. Two things demand attention: your brand-defining domain name and the TLD (e.g., .com, .in) that categorizes your domain. Familiarize yourself with these distinctions. For instance, “.com” signifies commercial domains, while “.in” corresponds to Indian demographic websites.
Defining Domain Name
Domain names, comprising alphanumeric characters, map to IP addresses. The website you’re currently reading has an IP address. Yet, human memory isn’t equipped to retain IP addresses. Domain names, aided by DNS, enable user-friendly access to desired websites. InfinitiveHost extends affordable domain registration services, facilitating your online presence through the best web hosting infrastructure. Join the ranks of over 1 million hosted websites and pave the way for your digital journey.
Steps to Registering a Domain Name
First, determine your desired domain name—your unique address on the internet. Consider it your virtual real estate.
Then, check the availability of your potential names using InfinitiveHost’s free tool. If available, proceed to select a registrar like InfinitiveHost.
Register and purchase your chosen domain name; each registrar offers distinct benefits and pricing. Complete the transaction by verifying your contact information and ensuring your domain isn’t suspended.
Step 3: Selecting a web hosting service

Picking the Perfect Web Hosting Service is the main point that requires your attention – web hosting infrastructure is the backbone of your site. But what is it?
Web Hosting in a Nutshell: Web hosting is an online service that provides users with server space through a subscription model. Subscribers gain access to store website files and data on physical servers. This includes advanced processors, ample bandwidth, and storage. InfinitiveHost takes the lead with Intel Xeon Processors, LiteSpeed servers, global data centers, and up to 25 Gbps bandwidth (exclusive to dedicated hosting).
Key Aspects to Evaluate When Choosing a Hosting Service
Choose a web hosting partner by considering the following factors:
- Uptime Average: Uptime percentage significantly influences website traffic. The higher the uptime, the better the traffic. InfinitiveHost offers 99.95% uptime with SSD NVMe storage.
- Technical Support: Access to reliable technical support is important, especially during website downtime. InfinitiveHost’s 24×7 manual support availability through live chat, phone, and email ensures swift issue resolution.
- SSL Certificates: SSL (Security Socket Layer) encrypts sensitive data between sites and browsers. It’s crucial for transaction security. InfinitiveHost offers free SSL certificates, ensuring the best online presence and security.
- Backup System: Regular backups safeguard against data loss. InfinitiveHost provides free daily backups, which are essential for unexpected incidents.
- Storage Capacity: A solid storage capacity is vital. InfinitiveHost employs SSD NVMe storage, enhancing speed and energy efficiency across all hosting plans.
Purchasing Hosting Services
A Simple process of purchasing Hosting services
- Navigate to the menu bar and select your desired hosting plan.
- Choose an appropriate plan from the options provided.
- Select the applicable options, like domain migration, domain registration, or Nameserver update.
- If registering a new domain, add your desired name and extension, and check availability.
- Add all features and preferred add-ons, such as SSL, Google Workspace, and more.
- Proceed with checkout.
Step 4: Crafting Your Website Structure

Your website’s structure defines how the information is presented, designed, and connected. Non-responsive layouts lead 73.1% of users to exit sites and 34.6% to leave due to poor content organization.
Your site needs to be user friendly not bot friendly
In recent years, the gap between optimal techniques for enhancing websites for both human users and bots has decreased. However, a significant portion of website owners continue to emphasize optimization for search engine crawlers over the human experience.
Statistics suggest that about 40% of users are inclined to disengage from a website if the layout and content are confusing.
- Streamline Links: Strike a balance between link interactions and on-page time by limiting the number of links per page. Opt for three to five links per 1,000 words to keep users engaged without overwhelming them.
- Hierarchical Headings: Use a logical heading hierarchy (H1, H2, H3, H4) to organize on-page content coherently for both humans and bots.
- Shallow Navigation: Users should access what they need within a few clicks. Keep clicks to a minimum, preferably four or fewer.
- Implement Breadcrumbs: Breadcrumbs enhance navigation, allowing users to move backward and forward. Keep customers engaged with this handy navigation feature.
Crucial Website Pages and Their Roles
- Homepage: Functioning as the primary gateway, the homepage often serves as the initial point of contact for visitors. While not all users enter through it, this is typically the first page they encounter.
- About Page: Establishing credibility with your audience and prospective customers hinges significantly on your website’s About Page. This page offers a concise overview of your website and the narrative that underpins your brand, ultimately leading to an enhancement in trustworthiness.
- Contact Page: Allow visitors to reach out easily by providing comprehensive contact information, including addresses, phone numbers, emails, social media links, and business hours. Directing users to FAQs or knowledge bases can also enhance their experience.
- Service Page (if applicable): For businesses offering services, this page outlines offerings. A clear, concise layout is essential, especially when presenting multiple services. Providing links to specific service details can enhance navigation.
- Terms of Service Page: Similar to your Privacy Policy, a Terms and Conditions page outlines user agreements to access your site. It’s a crucial legal aspect of your website.
Step 5: Crafting an Effective Website Design

Essential principles that demand your attention. Adhering to these is imperative to achieving a captivating design for your website. Let’s begin!
Tips for Crafting Exceptional Website Designs
- Assemble Your Brand Elements: Are you attentive to colors, fonts, and imagery? Excellent! These fundamental brand elements present the identity of your website. For instance, bold text denotes dominance, while serif font exudes formality and authority. Incorporating typographic elements will further enrich the user experience, leaving lasting impressions.
- Choose a Template or Theme: Imagine a picture within a frame. Different frames complement different images. Likewise, websites require fitting layouts for their content, images, text, and buttons. Pre-designed layouts or themes serve this purpose. If you’re working with WordPress, an array of free and premium themes is available. Opt for a theme aligned with your brand’s niche, preview it, and then proceed to download it.
- Outline Your Site’s Structure: What’s your internal linking strategy? As per SEO guidelines, internal links are crucial. Determine the number of web pages your site needs and contemplate the content type and general layout that best serve your website design.
- Utilize White Space: Strategically Introducing whitespace within your webpage design offers visitors visual ease. This practice is crucial for both website design and content creation. It not only minimizes distractions but also amplifies readers’ focus. When information overload looms, whitespace effectively segments content, especially on the homepage and vital pages.
- Streamline Navigation: Visitors rarely linger on a single page. “About us,” “Contact us,” and other internal pages beckon exploration. Thus, ensuring effortless navigation falls within your realm. Keep it simple. Employ a horizontal bar to facilitate scrolling, a widespread technique for enhancing navigation ease.
- Elevate Your CTAs’ Visibility: “Add to Cart,” “Buy Now,” “Call Us”—you’ve surely encountered these prompts while browsing a website. What are they? They’re CTAs (Call to Action), guiding users to sign up, subscribe, or take specific actions. To craft engaging CTAs, consider factors such as background color, surrounding images, and accompanying text. Make these elements stand out.
Incorporating these tips will undoubtedly contribute to the excellence of your website’s design.
Principles for Effective Website Design
- Embrace Simplicity: Simplicity remains paramount in web design. Avoid clutter and complexity, favoring a clean, user-friendly interface.
- Establish a visual hierarchy: Guide the user’s attention through a clear visual hierarchy, directing focus to essential elements. Size, color, and position influence what users notice first.
- Prioritize Load Time: Fast-loading websites enhance the user experience. Optimize your website for speed to prevent user frustration.
- Maintain Consistency: Consistency in fonts, colors, and styles across pages fosters a cohesive user experience while allowing for necessary diversity.
- Ensure Accessibility: Adhering to accessibility standards ensures your website caters to all users, including those with disabilities.
- Highlight Quality Content: While design engages users, quality content keeps them engaged. Balance both for the best user experience.
Step 6: Crafting Compelling Website Content

Website content is the heart of engagement. Here’s how to create effective content:
Writing Effective Website Copy
- Keep It Simple: Simplicity fosters readability. Avoid jargon and complex language, aiming for a clear and easily understood tone.
- Be Concise: Trim excess and stick to concise, meaningful content. A rule of thumb is to keep sentences under 20 words.
- Emulate Natural Speech: Write as if speaking to your audience naturally. This approach resonates better with readers.
- Take Breaks: Regular breaks maintain productivity and fresh thinking while writing.
- Break Up Content: Use paragraph breaks to segment content, enhancing readability.
The Power of Visuals
- Capturing Attention: Compelling visuals capture users’ attention, boosting traffic by 94%.
- Enhancing Sales: Emotional images aid sales by conveying messages more effectively.
- Improving Engagement: Engaging visuals decreases bounce rates, leading to more leads and sales.
- SEO Impact: Engaging images improves SEO and search engine ranking.
SEO Basics for Content
- Headers and Sub-Headers: Use headers and sub-headers to enhance readability and SEO optimization.
- Hyperlinking: Internal and external links boost SEO ranking and user engagement.
- Article Length: High-quality, longer content often ranks better; aim for 1500+ words.
- Keyword Integration: Incorporate relevant keywords naturally for improved search visibility.
Step 7: Installing Essential Plugins and Tools

Learn how plugins and tools can help you improve your WordPress website:
Understanding Plugins and Tools WordPress plugins enrich your site’s features, offering varied functionalities without coding.
Exploring Plugins and Tools
Plugins and tools play a crucial role in WordPress website development. They enable users to seamlessly incorporate additional functionalities without requiring coding expertise. This empowers you to create a feature-rich content management system without the need for complex coding.
These tools span from minor utilities to extensive extensions designed to increase the functionality and customization options of your WordPress site. Let’s take a swift overview of some essential WordPress plugins to enhance your website.
Crucial WordPress Plugins for Your Website
WPForms
Building WordPress contact forms shouldn’t need hiring developers. That’s precisely why WPForms was developed – an intuitive, powerful WordPress form builder that serves both beginners and experts.
WPForms facilitates the creation of captivating contact forms, feedback forms, subscription forms, payment forms, and more, all within minutes. Prioritizing user experience, WPForms provides pre-built forms and workflows, making it particularly accessible for beginners.
All-in-One SEO
For WordPress SEO optimization, the pioneering choice has been All in One SEO for WordPress. This comprehensive plugin has gained the trust of numerous savvy website owners, employing its ability to optimize WordPress sites for search engines.
Ensuring a proper WordPress SEO setup shouldn’t necessitate hiring developers or SEO experts. With All-in-One SEO, you can increase your website’s SEO ranking and unearth new growth opportunities in under 10 minutes, making it one of the most exhaustive WordPress SEO plugins.
MonsterInsights Among WordPress plugins
MonsterInsights boasts over 3 million active installations, securing its position as a leader. Understanding precisely how users engage with your website is a potent strategy for doubling traffic and sales. Empowered by MonsterInsights analytics and statistics, you can confidently expand your business.
This plugin facilitates easy integration between your WordPress site and Google Analytics, allowing you to make informed, data-driven decisions.
SeedProd
Initially, SeedProd provides the capability to craft “Coming Soon” and “Maintenance Mode” pages. This allowed visitors to encounter these pages while you engaged in website enhancements.
The user-friendly nature of SeedProd’s page builder sparked a desire among users to design their complete websites using it. Responding to widespread demand, SeedProd now enables you to construct entire WordPress websites with its tools.
Spectra
Suitable for both beginners and experienced designers, Spectra offers user-friendly features and abundant capabilities.
Spectra empowers designers to effortlessly modify websites to their specific needs using an array of pre-designed templates. Beyond aesthetics, Spectra focuses on optimizing website performance through efficient code and performance features, ensuring visually appealing sites deliver exceptional speed and functionality.
Pretty Links
Rather than relying on services like tinyurl.com or bit.ly, Pretty Links allows you to shorten links using your domain name. This not only creates clean, branded links but also tracks link hits, providing comprehensive reports on sources, browsers, and operating systems.
A benefit for enhancing affiliate links, tracking email clicks, and improving website reach, Pretty Links is a powerful plugin.
Shield Security
Diverging from conventional security plugins, Shield Security prioritizes intrusion prevention over repair. It proactively blocks potential threats before they can inflict harm, offering robust protection for your website.
No other independent WordPress security plugin adopts this security approach, surpassing even plugins like Wordfence, WP Cerber, Ninja Firewall, and All-In-One Security. The initial phase of any robust security system is detection and prevention, which is then followed by the repair process—both of which Shield Security effectively accomplishes.
How to Install and Configure Plugins?
Installing WordPress plugins is a straightforward process.
Follow these typical steps:
- Log in to Your WordPress Dashboard: Access your WordPress dashboard via your website’s URL (website.com/wp-admin).
- Navigate to the ‘Plugins’ Section: On the left-hand menu, locate and click on the “Plugins” section.
- Click ‘Add New’: At the top of the Plugins page, you’ll find the “Add New” button. Click it to initiate the plugin addition process.
- Search for Your Plugin: A search bar is available at the top of the Plugins page. Type in the name of the plugin you’re seeking and press Enter.
- Click ‘Install Now’: Once you’ve located your desired plugin, a button saying “Install Now” should be present. Click this button to commence the installation process.
- Activate the Plugin: Upon successful installation, the “Install Now” button changes to “Activate.” Click this button to enable the plugin and ensure its functionality.
- Configure the Plugin: Different plugins come with varying settings. You’ll typically find these settings under the “Settings” section in your WordPress dashboard or in a dedicated menu for the plugin. Consult the plugin’s documentation if you’re unsure about configuration.
Step 8: Testing Your Website

Now, it’s testing time! Validate the effort you’ve invested so far. Website testing is essential to analyze your measures and identify any potential gaps. This section highlights the significance of testing, the testing process, and how to address any shortcomings.
The Importance of Testing Your Website Several factors emphasize the importance of comprehensive website testing:
- Functionality Assessment: Testing is vital to identifying and rectifying even minor flaws or issues, ensuring your website functions smoothly. Addressing broken links, extended loading times, and wrong outputs.
- Browser Compatibility: Different web browsers exhibit varied functionalities. Ensuring cross-browser compatibility is integral, enabling your website to perform consistently across various browsers.
- Device Responsiveness: Testing device responsiveness is essential to guarantee that your website adapts seamlessly to different screen sizes and devices. Addressing this aspect is critical for optimal user experience.
- Performance Evaluation: Performance testing focuses on assessing loading speeds and overall site performance. By identifying and resolving issues related to loading times, you enhance user satisfaction and retention. Utilize tools to gauge loading speeds and optimize accordingly.
Components of Website Performance Testing
- Page Selection: To conduct a valuable performance test, pinpoint specific pages for analysis. Include highly visible, well-performing, and poorly performing pages to obtain a comprehensive view of your site’s performance.
- Speed and Load Analysis: Evaluate your website’s speed and load time, critical factors influencing user engagement and conversion rates. Monitor metrics such as time to render, time to first byte, and time to document completion.
- Optimization Planning and Implementation: Upon identifying performance gaps through testing tools, devise a plan to address these issues. Performance analysis tools often provide detailed reports along with tips to correct them. Take action on these insights to increase your website’s performance.
Step 9: Launching Your Website

Congratulations, you’ve reached the final step of – launching your website! This section outlines the steps to launch your website and emphasizes the significance of this crucial phase.
Steps to Launch Your Website
The success of your website is closely tied to effective digital marketing strategies. Therefore, building an online presence requires not only building trust but also understanding the customer lifecycle.
Here are the steps to successfully launch your website:
- Choose Hosting and Domain Name: After planning your website, secure a relevant domain name that reflects your brand. Opt for a simple yet distinctive domain name that aligns with your brand identity. Register your chosen domain name and obtain server space through a reliable web hosting plan.
- Create Pages and Content: Meaningful content and well-structured pages are the backbone of your website. Develop essential pages such as the home page, about us section, contact us page, and other relevant pages that enhance your brand’s credibility and establish connections with your target audience.
- Implement Search Engine Optimization (SEO): Optimize your website for search engines to achieve higher visibility and rankings on search engine results. Focus on both technical and non-technical aspects of SEO to drive increased organic traffic to your site.
- Ensure Responsive Design: Ensure your website design is responsive and user-friendly across various devices. Evaluate and enhance the design to ensure consistent functionality and visual appeal across different screen sizes.
Wrapping Up
In conclusion, embarking on the journey of crafting a website from scratch involves a detailed and informative step-by-step process. By following these stages, from conceptualization to design, development, and launch, you have the tools at your disposal to bring your digital vision to life.
Remember that every choice you make, from selecting design elements to optimizing functionality, contributes to the final result. The online world has limitless possibilities, and with the foundation laid by this comprehensive guide, you will be well-equipped to navigate and conquer the world of website creation. So, embrace the process, let your creativity flourish, and watch as your website evolves from an idea into a captivating digital reality.
Also Read:- 9 Tips To Boost Your Core Web Vitals In WordPress

9 Tips To Boost Your Core Web Vitals In WordPress
Table of Contents
Are you frustrated of your WordPress site’s slow loading times and bad user experience? The user experience is important when it comes to increasing conversion rates or rising search engine ranks.
You may have already installed several suggested WordPress speed and optimization plugins for a better user experience, but there’s more to it – the illusive Core Web Vitals.
But what exactly are they? Why are they so important? And how can you make them better for your WordPress site?
If you’re having trouble getting your website to rank on the first page of Google, this article will help you understand how Core Web Vitals and SEO may help you.
What is the importance of core web vitals?

Core Web Vitals and SEO are important since they assess user engagement and are directly related to the website experience. A pleasant visitor experience increases behaviors such as subscribing, purchasing, or inquiring. Slow loading speeds may cause users to leave your site.
Core Web Vitals is a ranking criteria considered by Google that influences search engine placement. The higher your website ranks, the better the user experience.
Google focuses excellent results for consumers, emphasizing the relevance of analytics for user experience. Here’s why the Core Web Vitals ranking element is important!
| Study Highlights | Impact on Metrics |
| Cloudways supported WP Bullet in achieving flawless Google Core Web Vitals and over 90 PageSpeed Insights ratings. | Client satisfaction has increased. |
| Page abandonment was decreased by 24% when the Core Web Vitals standards were met. | User engagement: The bounce rate has been reduced. |
| The Core Web Vitals enhancement by Netzwelt resulted in 18% greater ad income and 27% more page visits. | Increased advertising and engagement. |
| Farfetch’s conversion rate increased by 1.3% with every 100ms LCP decrease. | Increased web conversions for the company. |
| By lowering CLS from 1.65 to 0, redBus improved its worldwide domain ranking. | SEO: Improved domain ranks |
| A 0.2 drop in CLS resulted 15% more page visits, 13% longer sessions, and a 1.72% reduced bounce rate for Yahoo! JAPAN. | Improved session analytics have increased user engagement. |
What is the Core Web Vitals Passing Score?
| Good | Need Improvement | Poor | |
| LCP | <=2.5s | <=4s | >4s |
| FID | <=100ms | <=300ms | >300ms |
| CLS | <=0.1 | <=0.25 | >0.25 |
| INP (experimental) | <=200ms | <=500ms | >500ms |
Note: Interaction to Next Paint (INP), a new Core Web Vital measure, will take the place of First Input Delay (FID) beginning in March 2024.
What Are the Effects of Core Web Vitals on SEO?
The Page Experience Update, rolled out by Google in February-March 2022, focuses on improving the user experience by considering factors like secure browsing, mobile-friendliness, HTTPS usage, a lack of intrusive interstitials on mobile devices (Ad Experience), and Core Web Vitals. Initially subtle, its impact became evident over time, as businesses realized that investing in performance optimization led to faster pages, better user experiences, higher conversions, and improved Google rankings.
In 2023, Google is placing even more emphasis on Page Experience for SEO. Recent updates and industry developments indicate changes to the Page Experience report in Search Console. This report will evolve into a new page connecting to comprehensive guidance on the page experience. Users can also expect a dashboard view with individual Core Web Vitals and HTTPS reports, all available within the Search Console.
How to Get Your Site Ready for SEO Rankings
Google is evolving its website ranking criteria, with the Page Experience update. Starting December 1, 2023, Google will retire tools like the “Mobile Usability” report, the Mobile-Friendly Test, and the Mobile-Friendly Test API. While mobile usability remains crucial, you can now assess your site’s mobile-friendliness more effectively using Chrome’s Lighthouse tool.
In April 2023, Google changed its focus to prioritize user-friendliness, emphasizing fast loading, mobile compatibility, and user navigation. Google recommends using tools like the Page Experience report in Google Search Console to assess and enhance your website.
The Page Experience report is also undergoing changes, providing general advice on improving user satisfaction rather than specific details. This aims to enhance the user experience and boost your site’s visibility in search results.
If you have a WordPress website, it’s essential to adapt to the April update by:
- Selecting a streamlined theme for fast loading and mobile-friendliness.
- Optimizing images for smaller sizes and faster loading times.
- Implementing caching tools to speed up your site.
- Addressing JavaScript and CSS issues to improve page loading speed.
- Considering a Content Delivery Network (CDN) like Cloudflare CDN for faster loading, especially for distant users.
- Prioritizing the loading of essential content to improve the Largest Contentful Paint score.
- Being mindful of JavaScript usage to prevent site slowdowns.
Remember that aligning your website with Google’s updates isn’t just about pleasing Google; it’s about enhancing the user experience. By doing so, Google will reward you with better rankings.
Exploring the Toughest Web Vitals Metrics for Improved Performance

Now, let’s dive into the intricate details of performance improvement. Fixing Core Web Vitals isn’t a simple task, especially when your website contains a substantial amount of content. Among these critical Core Web Vitals metrics, one stands out as particularly challenging – Time to First Byte (TTFB).
TTFB measures the server’s response time, and ensuring a fast and prompt response can be quite demanding, especially depending on your website’s underlying framework.
This challenge becomes more pronounced, particularly for eCommerce websites. These platforms often feature dynamic and frequently changing pages, making it challenging to implement effective caching strategies. Moreover, extensive product catalogs can further complicate matters, ultimately affecting the Time to First Byte.
Another complex aspect is the Largest Contentful Paint (LCP). This metric assesses loading performance by gauging how swiftly the primary content of a page becomes visible. Achieving optimal LCP scores can be a formidable task, requiring meticulous attention and optimization efforts.
Cumulative Layout Shift (CLS) poses unique challenges for certain individuals. CLS assesses a page’s visual stability by quantifying unexpected layout shifts. This can be particularly intricate to address, especially for established websites with numerous resources and dependencies. In such cases, rectifying inefficient loading of assets like JavaScript files and fonts, and managing render-blocking assets, becomes key in achieving favorable CLS scores.
Effectively addressing these challenges can significantly enhance SEO performance and ensure a more seamless user experience.
Keep in Mind and Avoid These Mistakes When Optimizing Core

Let’s find out the crucial considerations and common pitfalls to avoid when optimizing Core Web Vitals to enhance SEO performance.
Prioritize Key Techniques
Improving Core Web Vitals involves several pivotal techniques:
- Lazyloading: Optimize your site by loading content as users scroll, reducing initial load times.
- Preloading: Preloading involves predicting user interactions and proactively loading vital resources to expedite rendering.
- Inline Critical CSS: Embed critical CSS directly into HTML to expedite rendering.
- Rendering First Visible Content: Prioritize loading initially visible content for a smoother user experience.
Mind the Fonts
Fonts have a significant impact on site performance. Efficient font loading entails considering font families, styles, glyph sets, and loading methods. Balancing preloading and browser-specific formats is essential.
Overlooked Optimization
Defer JavaScript optimization is often overlooked but can significantly improve Google PageSpeed Insights (GPSI) scores.
Tackle TTFB and Server-Side Scripts: Addressing Time to First Byte (TTFB) is crucial. Enhance server-side scripts like PHP or SQL to positively influence TTFB. Use caution when choosing page builders, themes, or plugins to improve all Core Web Vitals metrics.
Consistent Improvement
Achieving a lightweight, responsive, and speedy website is an ongoing endeavor. It’s essential to consistently apply best practices like page caching, GZIP or Brotli compression, and image optimization to uphold optimal page loading times.
Avoid Common Mistakes:
When striving for SEO excellence, be cautious of these pitfalls:
- Home Page Focus: Extend your page speed improvements beyond just the homepage to ensure a comprehensive Page Experience across your entire website.
- Image Size Optimization: Pay close attention to image sizes and avoid uploading oversized images that can negatively impact loading times.
- Prioritize SEO: Make SEO a priority during the web design process to avoid undermining your rankings.
- Managing Permalink Changes: Be prudent when altering permalink structures or relocating/deleting assets. Implement appropriate redirects to prevent disruption.
- UX Impact: Be mindful of HTTP status errors, broken links, and intrusive pop-ups, as they can harm the user experience and affect both users and rankings.
- Enhance User Experience: Create a positive user experience by avoiding intrusive pop-ups and interstitials that disrupt browsing. Maintain website security by avoiding the use of pirated themes or plugins and promptly addressing any potential security vulnerabilities.
How to Select the Best Tools to Measure Speed and SEO Performance
When it comes to assessing the speed and SEO performance of your WordPress website, several dependable tools are highly recommended. Here’s a list of essential tools to consider:
Google Page Speed Insights and Lighthouse
Google Page Speed Insights, along with Lighthouse and Lighthouse’s Scoring Calculator, are fundamental tools for evaluating your site’s performance. They offer comprehensive feedback on Core Web Vitals and provide suggestions for enhancements.
GTmetrix
GTmetrix, which now integrates Lighthouse metrics, is another valuable choice. It offers a quick and straightforward analysis of your site and provides a historical perspective on any changes you’ve made. It’s especially helpful for addressing server response time issues.
Chrome Developer Tools
Devtools, or developer tools, aid in inspecting, testing, and debugging code affecting browser UI. Marketers, SEO experts, and designers utilize them for webpage optimization. For in-depth audits and identifying optimization opportunities, Chrome’s ‘Network’ tab is a valuable resource. It provides a detailed view of the elements loaded by the browser, aiding in performance optimization.
WebPageTest
WebPageTest is a powerful tool that provides detailed insights into various performance aspects, including First Byte Time, CDN usage, and web vitals scores.
Sucuri SiteCheck
This free tool is invaluable for verifying your website’s security. It scans for malware and confirms its safe browsing status.
Google’s Mobile-Friendly Test Tool
When assessing mobile compatibility, Google’s Mobile-Friendly Test tool is a user-friendly and highly effective option.
Pingdom
Pingdom is another valuable tool for monitoring the speed and performance of your website. It provides insights into your site’s loading times and identifies areas that need improvement.
By making use of the tools mentioned above, you can effectively gauge the speed and SEO performance of your WordPress site.
The Essential Tips to Improving Web Vitals on WordPress

Now that you have a solid understanding of your website’s performance, let’s explore ways to boost your WordPress Core Web Vitals:
Install Core Web Vitals Plugin:
A straightforward approach is to use a free Core Web Vitals WordPress plugin like Jetpack Boost. It simplifies complex optimizations with easy toggles.
Here’s how to get started:
- Navigate to your WordPress dashboard’s Plugins section and select the option “Add New.”
- Search for Jetpack Boost and click Install Now, then Activate.
- Head to Jetpack and select Boost. Click the green Get Started button.
- Jetpack will assess your website’s current performance score.
Apart from Jetpack Boost, other useful plugins like Smush for image optimization and Autoptimize for streamlining CSS, JavaScript, and HTML files can further enhance your site’s performance when used alongside Jetpack Boost.
Choose Reliable Hosting:
Your choice of hosting provider plays a vital role in your website’s performance. Opt for a reputable host with fast server response times, SSD storage, and server-level caching for quicker site loading.
Prioritize server response times below 200ms and seek SSD storage for faster data access. Server-level caching reduces server load and enhances speed.
Consider the geographical location of your hosting provider’s data centers in relation to your target audience to minimize latency and improve the overall user experience. Managed WordPress hosting, tailored for WordPress websites, outperforms shared hosting.
For a hosting solution that meets these criteria and more, consider Cloudways. It includes a pre-installed Breeze cache plugin with your WordPress installation and Varnish cache integration for improved Core Web Vitals scores. You can see an impressive example of Cloudways’ performance in our fastest WordPress hosting blog, achieving a remarkable 79ms Load Time.
Use a Lightweight Theme
Selecting a well-optimized theme is crucial for a fast-loading website. To make the right choice:
Opt for a minimal, performance-focused theme to avoid excessive features, bloated code, and too many HTTP requests.
Consider these theme selection tips:
- Analyze the theme’s demo performance using tools like Google PageSpeed Insights or GTmetrix to assess its potential on your site.
- Give preference to themes that emphasize efficient code, minimize JavaScript usage, and offer responsive design support.
- Test the theme’s performance on a test site with your plugins and content to ensure it meets your requirements.
Compress Your Images
Images can significantly impact a website’s loading speed. To improve image performance:
- Choose appropriate image formats like WebP, JPEG XR, or AVIF for better compression and quality.
- Implement lazy loading to delay off-screen image loading, reducing initial page load times.
- Compress and resize images using tools such as TinyPNG or Imagify, or utilize top WordPress image optimization plugins.
- Enhance loading speed by installing a CDN like Cloudflare CDN to deliver images from nearby servers. Cloudways users can activate the Cloudflare Enterprise CDN add-on for Enterprise-level CDN features.
Minify CSS and JavaScript Files
CSS and JavaScript files play a significant role in your website’s loading speed.
To optimize them:
- Minify and Compress: Speed up your website by reducing CSS and JavaScript file sizes through minification and compression. This enhances overall performance. Services like Cloudflare Polish and Cloudflare Mirage can also optimize site images for faster loading.
- Combine and Inline: Minimize requests by combining multiple CSS or JavaScript files into one. Additionally, directly inline critical CSS and JavaScript into HTML to reduce separate requests.
- Remove Render-Blocking Resources: Identify resources that delay page rendering, like large CSS or JavaScript files loaded before content. Remove or optimize these resources to speed up page visibility.
Implement Server-Side Improvements
Server-side optimizations are crucial for improving your site’s performance.
To achieve this:
- Compression: Activate GZIP or Brotli compression on your server to reduce file sizes and speed up transfers. Typically, this can be configured through your server’s settings.
- Cache Setup: Implement server-level caching and cache-control headers to ease server load. This may involve adjusting server configuration files or using plugins like Breeze.
- Consider a Reverse-Proxy: Explore a reverse-proxy setup such as NGINX or Varnish. This configuration optimizes performance by caching content and distributing workloads across multiple servers, improving scalability and responsiveness.
Minimize the Utilization of Add-Ons
When dealing with plugins, thoughtful selection is essential. Each plugin introduces additional load to your webpage, which can impact overall performance. It’s advisable to keep only the essential plugins that serve a clear purpose.
Additionally, following Google’s recommendation, strive for a server response time of less than 600 milliseconds. This reflects the speed at which your server responds to requests, enhancing the user experience.
Optimize WordPress Database
Optimizing your WordPress database enhances performance by eliminating unnecessary data and reducing its size.
Here are the steps for effective database optimization:
- Clean Unnecessary Data: Use tools like phpMyAdmin to remove revisions, spam comments, and transients.
- Automate Maintenance: Maintain efficiency by employing top WordPress backup plugins like UpdraftPlus for automated database cleanup.
- Regular Backups: Ensure data security by regularly backing up your database. Cloudways offers automated backups with customizable frequencies, ranging from hourly to weekly.
Consider using SnapShooter, an affordable offsite backup solution. In partnership with DigitalOcean, SnapShooter offers an exclusive 20% discount to Cloudways customers for the first 3 months on all monthly payment plans.
Set up WordPress Cron Jobs
WordPress cron jobs are background tasks responsible for managing actions like plugin updates, scheduled post publication, and email notifications. Optimizing these tasks can improve your site’s performance.
To optimize WordPress cron jobs:
- Disable Default Cron: Increase efficiency by deactivating the default WordPress cron system.
- Add define(‘DISABLE_WP_CRON’, true); to your wp-config.php file.
- Additionally, schedule resource-intensive tasks during low-traffic periods, such as overnight or on weekends, to minimize their impact on performance.
Wrapping Up
And there you have it! You should now be well-equipped to optimize your website for the Google Page Experience Update. Improving your Core Web Vitals scores may present challenges, with various web performance techniques, some more complex and time-consuming than others, needed.
Nevertheless, attaining a favorable score is entirely achievable. This article has provided you with insights from nine valuable tips that lead the way to success.
Now, it’s time to put your newfound knowledge of Core Web Vitals and SEO into practice. If you encounter any obstacles along the way, don’t hesitate to reach out in the comments.
Also Read :- What Is WP-Staging Plugin For WordPress?

Cracking the Code of the HTTPS Port: Its Purpose and Implementation
Table of Contents
A port number functions as a communication endpoint through which data transmissions are both dispatched and received. Multiple ports, each assigned a distinct set of numbers, serve diverse purposes in networking.
When you access a website, your web browser establishes a connection with a hosting server through specific network ports, such as 443 or 8443. These ports are exclusively designated for secure HTTPS connections, which deploy Secure Sockets Layer (SSL) or Transport Layer Security (TLS) certificates to ensure encryption.
This article is intended to clarify the concept of HTTPS ports, outline their distinctions from SSL certificates, and offer illustrative instances for better understanding. Moreover, it furnishes a comprehensive guide on how to activate port numbers 443 and 8443 on diverse operating systems like Windows and macOS.
What is an HTTPS Port?
Assuming you’re familiar with the full form of HTTPS, let’s delve into the essence of the topic. An HTTPS Port is essentially a virtual doorway fortified with SSL and TLS encryption. Consequently, you’re ensuring a secure browsing experience for your website visitors.
Now, you might wonder if there’s just one port. Well, no, there are multiple. Similar to having distinct ID cards, ports have unique numbers that set them apart.
Two commonly used default HTTPS ports are 443 and 8443. These ports are like sentinels, establishing robustly secured communication for web browsing.
The operational sequence is straightforward: Initiate requests to the hosting server via ports 443 or 8443. The Server connects to the designated port. The resultant data reaches the web browsers, all while keeping security vulnerabilities at bay.
How Does HTTPS Safeguard Data Transmission Across Networks?
HTTPS accomplishes data protection during transmission with SSL or TLS certificates. Notably, SSL and TLS are often used interchangeably because there is no difference between them.
However, it’s worth noting that TLS is an advanced and updated iteration of SSL. As websites increasingly gravitate toward enhanced security, they’re transitioning from SSL to the more robust TLS within the HTTPS protocol.
Difference Between SSL and HTTPS Port

The HTTPS protocol functions on top of an SSL certificate that is installed on a web server. While these elements collaborate, they each play distinct roles in establishing encrypted connections.
An SSL certificate verifies a user’s identity during information transmission. However, this technology is currently replaced by TLS, which outperforms its predecessor.
The primary distinction between HTTP and HTTPS lies in the latter’s provision of a secure channel for transmitting encrypted data.
To ascertain a website’s use of an SSL certificate, observe its URL for the presence of an HTTPS extension and a padlock icon to the domain name.
Commonly Used HTTPS Ports

Within this section, we will explore the two most prevalent HTTPS ports: 443 and 8443.
Port 443
As acknowledged by the Internet Engineering Task Force (IETF), TCP port number 443 stands as the default home for the HTTPS protocol. It offers an encryption algorithm to facilitate the secure exchange of data between web servers and browsers. The workings of HTTPS port 443 involve safeguarding packets of network traffic before they embark on their data transmission journey.
Serving as a dedicated gateway to the web realm, it wields an SSL/TLS certificate to morph original text into cryptographic code, which then transforms into ciphertext prior to being dispatched to the server. This double layer of transformation prevents any unauthorised snooping or interception of data in transit across the protocol.
Port 8443
Moving on, port number 8443 emerges as an alternate avenue for HTTPS and serves as a cornerstone for the SSL text service within the Apache Tomcat web server.
Furthermore, this port boasts primary usage as an HTTPS Client Authentication connection protocol.
HTTPS port functionality entails generating an authentication key pair, securely held within the web browser, for the user. The server subsequently authenticates the private key to establish a secure connection, thereby ensuring data traffic remains encrypted and shielded.
List of HTTPS Port Numbers
Below, you will find service names and transport protocol port registrations derived from the Internet Assigned Numbers Authority (IANA):
| Port | Function |
| 443 | HTTPS |
| 631 | Internet Printing Protocol over HTTPS (IPPS) |
| 664 | DMTF out-of-band secure web services management protocol |
| 832 | NETCONF for SOAP over HTTPS |
| 1129 | SAPHostControl over SOAP/HTTPS |
| 1184 | LL Surfup HTTPS |
| 2381 | Compaq HTTPS |
| 4036 | WAP Push OTA-HTTPS |
| 4849 | App Server – Admin HTTPS |
| 5443 | Pearson HTTPS |
| 5989 | WBEM CIM-XML (HTTPS) |
| 5990 | WBEM Export HTTPS |
| 6443 | Service Registry Default HTTPS Domain |
| 6771 | PolyServe HTTPS |
| 7202 | Inter-Channel Termination Protocol (ICTP) for multi-wavelength PON (Passive Optical Network Systems) |
| 7443 | Oracle Applications Server HTTPS |
| 7677 | Sun App Server HTTPS |
| 8243 | Synapse Non-Blocking HTTPS |
| 8443 | PCsync HTTPS |
| 8991 | Webmail HTTPS service |
| 9295 | ARMCenter HTTPS service |
| 9443 | WSO2 Tungsten HTTPS |
| 9444 | WSO2 ESB Administration Console HTTPS |
| 16993 | Intel(R) AMT SOAP/HTTPS |
| 20003 | Commtact HTTPS |
Why Opt for an HTTPS Port?
For website owners, adopting a secure channel holds utmost importance. Here are four primary reasons why you should switch to an HTTPS port:
- Safeguarding Sensitive Information: One of the pivotal advantages of deploying SSL lies in its ability to encode and validate data throughout transmission. This encapsulates data in transit, preventing potential breaches and shielding it against malicious man-in-the-middle (MITM) attacks.
- Keeps Online Transactions Secure: Owners of eCommerce platforms are mandated to wield an SSL certificate. This cryptographic tool encrypts financial data in accordance with the Payment Card Industry Data Security Standards (PCI DSS).
- Elevating Search Engine Visibility:HTTPS is an important aspect of search engine optimization (SEO). As a result, websites that have an SSL certificate are more likely to rank higher on Search Engine Result Pages (SERP).
- Fostering Trust and Amplifying Conversion Rates: An HTTPS-enabled site assures visitors that their sensitive information is safe and secure. This sense of safety increases the possibility of repeat visits, boosting client trust and maximising conversion rates.
Enabling Ports 443 and 8443 on Windows and macOS Operating Systems

On Windows
To enable ports 443 and 8443 on the Windows firewall, follow these steps:
- Open the Control Panel.
- Click System and Security, then Windows Defender Firewall.
- Select “Advanced settings.
- The window of “Windows Defender Firewall with Advanced Security” will appear. Select Inbound Rules and click “New Rule.”
- The “New Inbound Rule Wizard” window will open. Choose “Port” and click “Next.”
- Click “TCP” under the “Does this rule apply to TCP or UDP?” option. Enter the port numbers 443 and 8443 next to “Specific local ports,” separated by a comma. Click “Next” when done.
- Choose the “Allow the connection” option and proceed by clicking “Next.”
- Check the boxes for the “Domain,” “Private,” and “Public” profiles, then click “Next.”
- Finally, assign a name to the rule and provide an optional description if desired. Click “Finish” to complete the process.
On macOS
Here is the procedure for permitting ports 443 and 8443 on the macOS firewall:
- Open “System Preferences” and choose “Security & Privacy” to confirm the firewall’s status. It should be activated as the default setting.
- If the firewall is already active, open the Terminal and log in as the root user.
- Subsequently, access the packet filter configuration file by entering the following command and pressing the “Enter” key:
sudo nano /etc/pf.conf
- Insert these two lines at the bottom of the pf.conf file to enable access for ports 443 and 8443:
pass in inet proto tcp from any to any port 443 no state
pass in inet proto tcp from any to any port 8443 no state
- Use shortcut Control+ O and Press ENTER to store your modifications. Utilize Control + X to exit the text editor.
- To refresh the firewall configuration file, execute the following command:
sudo pfctl -f /etc/pf.conf
- At the end, type the below command and press ENTER to restart the firewall on its own:
sudo pfctl -e
Wrapping Up
Understanding the significance of HTTPS ports, their functionality, and their integration within the broader landscape of secure web browsing is crucial in today’s digital world. These ports stand as the gateways that safeguard data transmissions and establish encrypted connections, ensuring data security and user trust.
As we delve into the intricacies of HTTPS ports and their associated benefits, it’s evident that their role goes beyond mere technicalities. They fortify sensitive data transmission, bolster online transaction security, boost search engine visibility, and enhance customer trust and conversion rates.
Whether you’re a website owner, a developer, or a user, grasping the mechanisms behind HTTPS ports empowers you to make informed decisions that prioritize security and reliability. From enabling ports on diverse operating systems to comprehending the synergy between SSL and HTTPS, this article has unraveled the complexities surrounding HTTPS ports and their implementation.
So, whether you’re navigating the Windows firewall, configuring macOS settings, or delving into the depths of Linux, the journey through HTTPS ports opens doors to safer online experiences, robust data protection, and a heightened digital ecosystem.
Also Read :- Hyper V vs. VMware ESXi : Which is better ?

Things To Remember While Buying Managed Cloud Services
Table of Contents
Cloud computing has revolutionized the way businesses manage their IT infrastructure. It has offered businesses a flexible, scalable, and cost-effective solution to manage their IT infrastructure. However, managing a cloud infrastructure can be a challenging task for businesses, especially if they lack the necessary skills and resources. This is where managed cloud services come into play. It provides businesses with the necessary support to manage their cloud infrastructure effectively. In this blog, we will discuss in detail what managed cloud services are, which companies can be categorized as managed service providers on cloud, the benefits of hiring them, and how to choose a managed service provider on cloud.
Deep Overview of Managed Cloud Service Hosting

It is a type of cloud service that provides businesses with the necessary support to manage their cloud infrastructure effectively. These providers offer a range of services, including infrastructure management, security management, database management, network management, and application management.
These services allow businesses to outsource their cloud management tasks to a third-party service provider. The service provider takes care of all the management tasks, including software updates, security patches, and system monitoring. This allows businesses to focus on their core competencies while the service provider takes care of the IT infrastructure.
The services of managed cloud are available in different deployment models, including public, private, and hybrid cloud. Public cloud services are offered by third-party providers, while private cloud services are managed in-house by the organization. Hybrid cloud services combine the benefits of both public and private clouds.
Which Companies Can Come Under the Category of Managed Cloud Service Providers?

There are many companies that provide managed cloud services to businesses. Some of the well-known companies in this space include Amazon Web Services (AWS), Microsoft Azure, Google Cloud, IBM Cloud, Rackspace, and many others.
- AWS is one of the leading providers of managed cloud services. It offers a wide range of services, including infrastructure management, security management, and application management. AWS provides businesses with the flexibility to choose from a range of services that best suit their needs.
- Microsoft Azure is another popular provider of managed cloud services. It offers a range of services, including infrastructure management, database management, and security management. Microsoft Azure provides businesses with a high level of security and compliance.
- Google Cloud is another popular provider of managed cloud services. It offers a range of services, including infrastructure management, database management, and application management. Google Cloud provides businesses with a high level of scalability and flexibility.
Benefits of Hiring a Managed Cloud Service Provider
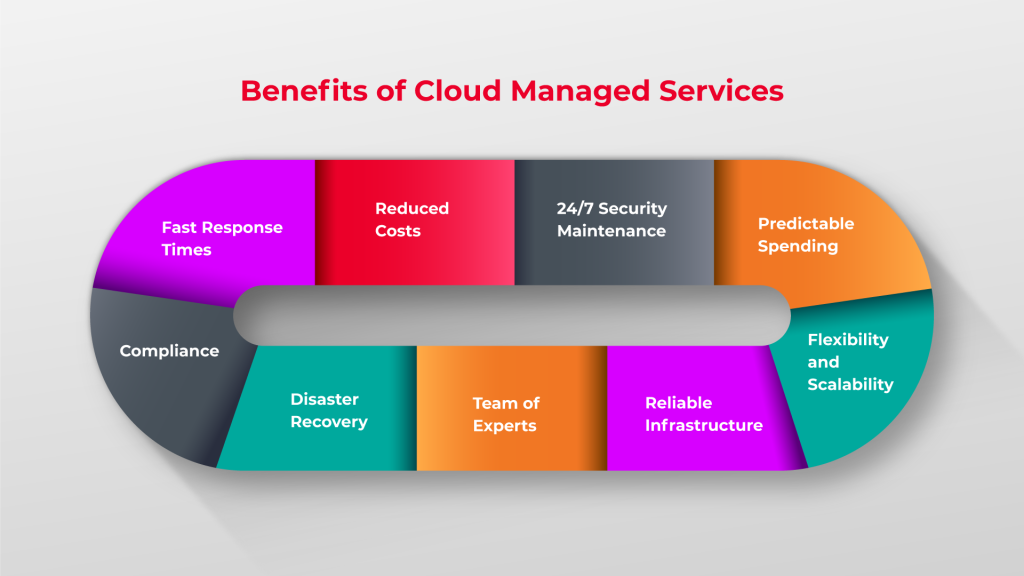
There are many benefits of hiring a managed cloud service provider for businesses. Some of these benefits include:
- Cost-Effective: It is cost-effective compared to managing the IT infrastructure in-house. Businesses do not need to invest in hardware, software, or IT staff, which can be expensive.
- Scalability: It offers businesses the flexibility to scale their IT infrastructure as per their needs. Businesses can quickly add or remove resources as per their requirements.
- Focus on Core Competencies: It allows businesses to focus on their core competencies while the service provider takes care of the IT infrastructure. This allows businesses to be more productive and efficient.
- Security: Managed cloud companies offer a high level of security and compliance. They have the necessary expertise and resources to manage security and compliance effectively.
- Disaster Recovery: It offers disaster recovery solutions to businesses. This ensures that businesses can quickly recover from any disaster or downtime.
How to Choose a Managed Cloud Service Provider?
1. Evaluate Your Business Needs
Before you begin searching for a managed cloud service provider, evaluate your business needs. Determine what services you require, your budget, and your timeline. This will help you narrow down your options and find a provider that offers services that align with your business needs.
2. Consider Security Measures
Security is a top concern for businesses when it comes to cloud computing. Look for a managed cloud service provider that has robust security measures in place to protect your data. Ask about their security protocols, such as data encryption, access controls, and intrusion detection and prevention systems.
3. Check Service Level Agreements (SLAs)
SLAs outline the terms and conditions of the service that the provider offers. It’s essential to read and understand the SLA before signing any contract. Look for a provider that offers a comprehensive SLA that covers performance, uptime guarantees, and support services.
4. Check the Provider’s Track Record
To check the track record of managed cloud companies. Look for a provider that has experience working with businesses similar to yours. Check their customer reviews and testimonials to get an idea of their customer satisfaction levels.
5. Evaluate Their Support Services
Support services are essential when it comes to managed cloud services. Ensure that the provider offers 24/7 support and has a dedicated support team. Look for a provider that offers different support channels such as phone, email, and chat.
Conclusion
Choosing the right managed cloud service provider can be challenging, but by following the tips outlined in this buyer’s guide, you can find a provider that meets your business needs. Remember to evaluate your business needs, consider security measures, check SLAs, evaluate the provider’s track record, and evaluate their support services.
It can help your business optimize your cloud infrastructure, reduce downtime, and increase efficiency. By choosing the right provider, you can take advantage of these benefits and more.
In conclusion, take your time when selecting a managed service provider on cloud, and ensure that they offer the services you need, have a robust security system, provide a comprehensive SLA, have a good track record, and offer excellent support services. With the right provider, you can leverage the power of the cloud to help your business grow and succeed.
Related:- The Benefits Of Cloud Hosting Servers

How Linux VPS Hosting Improves Your Website SEO
Table of Contents
Introduction:

Linux VPS (Virtual Private Server) hosting is a type of web hosting that provides users with their own virtual server, which is partitioned from a larger physical server. With Linux VPS hosting, users have full control over their virtual server, including root access, and can install and configure any software they choose. This hosting solution is often used by websites that require more resources than what shared hosting can provide, but don’t need the dedicated resources of a full server.
Linux is a popular operating system used for VPS hosting due to its open-source nature, stability, security, and flexibility. Best Linux VPS server hosting Server offers several benefits, such as increased control over server settings, better performance, and improved security. It is also highly customizable, making it a popular choice for businesses and individuals who require more flexibility and control over their hosting environment.
Linux VPS hosting can provide a powerful and cost-effective solution for website owners who need more resources and control than what shared hosting can offer, but don’t require a full dedicated server. It is a reliable and secure hosting option that can be customized to meet the specific needs of each user.
Benefits of Linux VPS Hosting Server Benefits for your website SEO:
Best Linux VPS hosting offers several benefits for your website’s SEO (Search Engine Optimization). Here are some of the ways it can help:

1.Better website speed:
Linux VPS hosting can provide faster website loading times than shared hosting, which is essential for SEO. Search engines like Google use website speed as a ranking factor, so having a fast website can improve your SEO.
2.Enhanced security:
Linux is known for its security features, and Linux VPS server hosting can provide added security for your website. A secure website can help prevent hacking attempts and protect your data, which can also improve your SEO.
3.More control over your website:
With Linux VPS hosting, you have more control over your website’s server settings, allowing you to optimize your website for SEO. You can install custom software, optimize your website’s performance, and make other changes that can improve your website’s SEO.
4.Improved uptime:
Linux VPS server hosting typically offers higher uptime rates than shared hosting. Search engines prefer websites that are online and available to users, so a high uptime rate can help improve your website’s SEO.
5.Better scalability:
Linux VPS hosting can accommodate higher levels of website traffic and data usage, which is essential for SEO. As your website grows and attracts more visitors, you can upgrade your VPS hosting plan to accommodate your needs without any downtime or impact on your SEO.
Also Read:-Why Choose Linux KVM-Based VPS Hosting?
Conclusion:
Linux VPS hosting Server can provide several benefits for your website’s SEO. By offering faster website speed, enhanced security, more control over your website, improved uptime, and better scalability, Linux VPS hosting can help improve your website’s search engine rankings and attract more organic traffic.
Overall, Linux VPS hosting can offer several benefits that can positively impact your website’s SEO. By improving website speed, uptime, and customization options, you can enhance the user experience and increase your website’s visibility on search engines.
With the ability to customize server settings and install custom software, website owners have the flexibility to optimize their website for SEO and ensure it performs at its best.
Furthermore, Linux VPS hosting is a reliable and cost-effective solution for businesses and individuals who require more resources and control over their hosting environment. By leveraging the benefits of Linux VPS hosting, website owners can gain a competitive edge in the online marketplace and drive success for their websites.

How Can Web Analytics Be A Game Changer For Your Business?
Table of Contents
Introduction
Having an understanding of web analytics can be a major asset for any business, especially when it comes to growing and maximizing profits. By properly monitoring website traffic and engagement trends, businesses are able to gain insights into how users are interacting with their site and how to best utilize available resources. Website analytics can also help businesses identify areas for improvement and adapt to market changes.
Web analytics can be used to gain valuable insights into how customers interact with your website, which can help you make informed decisions about the future of your business. By analyzing website data, you can identify trends and patterns that can help you better understand customer behavior and optimize your website for maximum conversions. With the right analytics tools in place, you can track user engagement, analyze user journeys, measure key performance indicators (KPIs), and more. By leveraging these insights, businesses can make smarter decisions that will ultimately lead to improved customer experience and increased profits.
Understanding Web Analytics in Detail

To get the most out of website analytics, businesses should begin by setting up their web analytics platform. This can include any combination of web tracking, user segmentation and metrics such as page views, time on site and bounce rate to name a few. Having a clear understanding of how to take advantage of these different metrics and determining how they can be used to optimize your website is key.
Once your web analytics are set up, the next step will be to understand and analyze the data. This means breaking down the data into different metrics and understanding what they mean. For instance, page views can help provide an understanding of how many users are visiting your site and time on site can give you an idea of how engaged they are. Knowing what’s driving the majority of your traffic and who’s frequenting your site can help you refine your strategies when it comes to marketing and optimizing your website.
Website analytics can also be used to track conversion rates and measure success. By tracking the number of visitors who convert into customers or subscribers, businesses can gain valuable insight into what’s working and what needs to be refined. Additionally, website analytics can be used to better understand customer behavior, giving businesses the ability to customize their site and marketing efforts for increased success.
Finally, website analytics can help businesses gain a competitive edge by providing insight into what their competitors are doing. By evaluating competitor marketing campaigns, businesses can gain an understanding of how to better position themselves for success. This could mean running ads on the same channels as their competition or taking advantage of the same metrics that their competitors are using to measure success.
How can InfinitiveHost help?

At InfinitiveHost, we specialize in helping businesses maximize the power of web analytics. Our analytics experts understand the importance of accurate data and will help you gather valuable insights that can drive your business forward. We can help you not only track and analyze your website’s performance but also develop strategies to take advantage of the data and optimize your website’s performance.
Infinitive Host offers a range of solutions to help businesses better understand their web analytics. With the help of advanced analytics, businesses can gain valuable insights into how their website is performing and make informed decisions on how to optimize it for maximum success. Infinitivehost can provide you with the tools you need to track vital metrics such as page views, bounce rate, time on site, and more. By leveraging these insights, businesses can create strategies for improving website performance and increasing conversions. With Infinitive Holst’s suite of analytics solutions, you can supercharge your business by understanding your customers’ needs and optimizing your website accordingly.
Hence, web analytics can be a powerful tool to supercharge your business. By leveraging the insights provided by analytics tracking, you can gain valuable insights into customer behavior, optimize your website, and grow your business. With the help of InfinitiveHost, you can make the most of the data and unlock your website’s full potential.
Conclusion
Overall, website analytics can be a powerful tool for businesses. By understanding the different metrics that are available, businesses can gain valuable insight into their user base, optimize their website and marketing campaigns and gain an understanding of what their competitors are doing. This “supercharge” can be the difference between success and failure, and all it takes is a bit of time, effort, and savvy.

Guide to the Different Types of VPS Servers
In the ever-evolving world of web hosting, VPS Servers (VPS) have emerged as versatile and powerful solutions catering to diverse website needs. A VPS offers the perfect balance between shared hosting’s affordability and dedicated hosting’s performance.
Table of Contents
What is VPS hosting?
VPS hosting is a virtual machine and virtualization server that allows you to store website data and files on a shared server that looks like a dedicated, private server. All resources share the same physical web space as many other virtual machines.
All resources on the server (memory, disk space, content, processor speed, etc.) are shared by all other virtual machines, but run independently, providing unlimited bandwidth and additional customization capabilities.
What is the purpose of VPS Servers hosting?
VPS hosting is mainly used for developers, programmers, eCommerce websites, software-as-a-service (SaaS) providers, and agencies that create more than one website.
Virtual Private Server (VPS) hosting serves several important purposes for businesses and individuals who require a more advanced and customizable hosting solution compared to shared hosting.
VPS hosting offers:
· File storage which can be accessed anywhere
· Safe and secure backup environment
· Assistance for Email hosting and cloud-based hosting
Flexibility is an important factor of VPS Server
A VPS hosting package offers unmatched flexibility. Whether it’s managed VPS, unmanaged VPS hosting, or Linux-based VPS, the virtual server’s scalability is truly remarkable.
The method of virtualization used to create individual private server partitions allows each virtual private server to be fully customized, enabling the installation of any desired software, operating system, or package.
The best-managed VPS hosting providers offer server capacity upgrades (memory, CPU, etc.), facilitating seamless scalability up or down as needed.
A private server or VPS can be managed or unmanaged, with the client assuming full responsibility for software updates and patches.
A virtual private server is an excellent choice for operating SaaS projects like personal clouds or VPN servers, as well as websites with a reasonable volume of concurrent users.
Different Types of VPS Server (Virtual Private Servers)

Did you know that there are different types of VPS servers, each tailored to unique requirements? Let’s take a deep dive into the various types of VPS servers available today.
Server-Based Linux VPS Server Hosting
Cloud VPS
Cloud VPS (Virtual Private Server) hosting is a type of hosting service that combines the benefits of virtualization technology with the flexibility and scalability of cloud computing. It provides users with a virtualized environment on cloud infrastructure, offering dedicated resources and a high degree of control over their server environment.
Windows VPS
A Windows VPS (Virtual Private Server) contain a virtualized hosting environment designed to operate on the Windows operating system. It provides users with a dedicated portion of a physical server’s resources, allowing them to have a virtual server that functions independently within a shared hosting environment. Windows VPS hosting is particularly suited for websites, applications, and projects that require compatibility with Windows-specific software, technologies, or programming languages.
It’s a great choice for businesses that depend on Microsoft technologies for their operations.
Linux VPS
Linux VPS (Virtual Private Server) hosting is a type of virtualized hosting service that runs on a Linux operating system. It provides users with a dedicated portion of a physical server’s resources, allowing them to have an isolated virtual server that operates independently within a shared hosting environment.
Linux VPS is built for those who prefer the open-source flexibility of Linux operating systems. With a plethora of distributions to choose from (Ubuntu, CentOS, Debian, etc.), Linux VPS is widely popular among developers and businesses looking to harness the power of open-source technologies.
Types of VPS Hosting based on Server Management

Managed VPS Server
A managed VPS is designed for those who want a hassle-free hosting experience. Under a managed VPS, the hosting provider takes care of server management responsibilities, such as software updates, security patches, and ongoing maintenance. This option is perfect for businesses or individuals who lack the time or technical expertise to manage their server environment.
Unmanaged VPS Server
Unmanaged VPS puts the responsibility of server management on the user. Ideal for experienced developers and system administrators, an unmanaged VPS provides complete control over server configurations, software installations, and security measures. While it offers unparalleled customization, it demands technical proficiency to maintain and troubleshoot the server effectively.
How to Select the Ideal VPS Plan?

The choice of the right plan often revolves around the decision between managed or unmanaged VPS plans. We believe that this is a straightforward question to ask.
If you don’t have much time and expertise to manage a server and have no specific OS or software needs, then a managed VPS is the best choice. However, if you want full control over server configurations and software installations, then an unmanaged VPS is the best option.
Here are a few additional factors that help you in decision-making.
Features: Managed VPS plans come up with default features that streamline web hosting for simplicity. For an unmanaged VPS, you’ll need to pay extra for any desired services you want included in your plan.
Security: If you don’t have an experienced person in cybersecurity, it is best to leave your web host and only focus on your website’s protection. However, if you possess knowledge in this domain or hire a third-party developer, an unmanaged VPS enables you to carefully increase the security of your server.
Price: Although an unmanaged VPS may seem more budget-friendly due to its lower costs, a managed VPS plan consistently proves to be the most cost-effective solution when factoring in all the supplementary features and paid services that might be required later on an unmanaged VPS. Infinitive Host offers effective and affordable VPS hosting services.
Also Read:- Benefits Of VPS Hosting For High -Traffic Websites
Wrapping Up
In conclusion, the diverse world of VPS servers offers options for every need and skill level. Whether you’re a tech-savvy developer seeking complete control or a business owner looking for a hassle-free solution, there’s a VPS type tailored to your requirements. Understanding these various types empowers you to make an informed decision and select the VPS server that best aligns with your goals and aspirations.
Choosing the perfect VPS plan requires factors such as features, security, and price. VPS hosting, with its various offerings and customized solutions, redefines the hosting landscape. Infinitive Host provides effective and affordable VPS hosting services, to move your web hosting experience to new heights.

Things To Remember While Buying Managed Cloud Services
Cloud computing has revolutionized the way businesses manage their IT infrastructure. It has offered businesses a flexible, scalable, and cost-effective solution to manage their IT infrastructure. However, managing a cloud infrastructure can be a challenging task for businesses, especially if they lack the necessary skills and resources. This is where managed cloud services come into play. It provides businesses with the necessary support to manage their cloud infrastructure effectively. In this blog, we will discuss in detail what managed cloud services are, which companies can be categorized as managed service providers on cloud, the benefits of hiring them, and how to choose a managed service provider on cloud.
Deep Overview of Managed Cloud Service Hosting
It is a type of cloud service that provides businesses with the necessary support to manage their cloud infrastructure effectively. These providers offer a range of services, including infrastructure management, security management, database management, network management, and application management.
These services allow businesses to outsource their cloud management tasks to a third-party service provider. The service provider takes care of all the management tasks, including software updates, security patches, and system monitoring. This allows businesses to focus on their core competencies while the service provider takes care of the IT infrastructure.
The services of managed cloud are available in different deployment models, including public, private, and hybrid cloud. Public cloud services are offered by third-party providers, while private cloud services are managed in-house by the organization. Hybrid cloud services combine the benefits of both public and private clouds.
Which Companies Can Come Under the Category of Managed Cloud Service Providers?
There are many companies that provide managed cloud services to businesses. Some of the well-known companies in this space include Amazon Web Services (AWS), Microsoft Azure, Google Cloud, IBM Cloud, Rackspace, and many others.
- AWS is one of the leading providers of managed cloud services. It offers a wide range of services, including infrastructure management, security management, and application management. AWS provides businesses with the flexibility to choose from a range of services that best suit their needs.
- Microsoft Azure is another popular provider of managed cloud services. It offers a range of services, including infrastructure management, database management, and security management. Microsoft Azure provides businesses with a high level of security and compliance.
- Google Cloud is another popular provider of managed cloud services. It offers a range of services, including infrastructure management, database management, and application management. Google Cloud provides businesses with a high level of scalability and flexibility.
Benefits of Hiring a Managed Cloud Service Provider
There are many benefits of hiring a managed cloud service provider for businesses. Some of these benefits include:
- Cost-Effective: It is cost-effective compared to managing the IT infrastructure in-house. Businesses do not need to invest in hardware, software, or IT staff, which can be expensive.
- Scalability: It offers businesses the flexibility to scale their IT infrastructure as per their needs. Businesses can quickly add or remove resources as per their requirements.
- Focus on Core Competencies: It allows businesses to focus on their core competencies while the service provider takes care of the IT infrastructure. This allows businesses to be more productive and efficient.
- Security: Managed cloud companies offer a high level of security and compliance. They have the necessary expertise and resources to manage security and compliance effectively.
- Disaster Recovery: It offers disaster recovery solutions to businesses. This ensures that businesses can quickly recover from any disaster or downtime.
How to Choose a Managed Cloud Service Provider?
- Evaluate Your Business Needs
Before you begin searching for a managed cloud service provider, evaluate your business needs. Determine what services you require, your budget, and your timeline. This will help you narrow down your options and find a provider that offers services that align with your business needs.
- Consider Security Measures
Security is a top concern for businesses when it comes to cloud computing. Look for a managed cloud service provider that has robust security measures in place to protect your data. Ask about their security protocols, such as data encryption, access controls, and intrusion detection and prevention systems.
- Check Service Level Agreements (SLAs)
SLAs outline the terms and conditions of the service that the provider offers. It’s essential to read and understand the SLA before signing any contract. Look for a provider that offers a comprehensive SLA that covers performance, uptime guarantees, and support services.
- Check the Provider’s Track Record
To check the track record of managed cloud companies. Look for a provider that has experience working with businesses similar to yours. Check their customer reviews and testimonials to get an idea of their customer satisfaction levels.
- Evaluate Their Support Services
Support services are essential when it comes to managed cloud services. Ensure that the provider offers 24/7 support and has a dedicated support team. Look for a provider that offers different support channels such as phone, email, and chat.
Conclusion
Choosing the right managed cloud service provider can be challenging, but by following the tips outlined in this buyer’s guide, you can find a provider that meets your business needs. Remember to evaluate your business needs, consider security measures, check SLAs, evaluate the provider’s track record, and evaluate their support services.
It can help your business optimize your cloud infrastructure, reduce downtime, and increase efficiency. By choosing the right provider, you can take advantage of these benefits and more.
In conclusion, take your time when selecting a managed service provider on cloud, and ensure that they offer the services you need, have a robust security system, provide a comprehensive SLA, have a good track record, and offer excellent support services. With the right provider, you can leverage the power of the cloud to help your business grow and succeed.

")